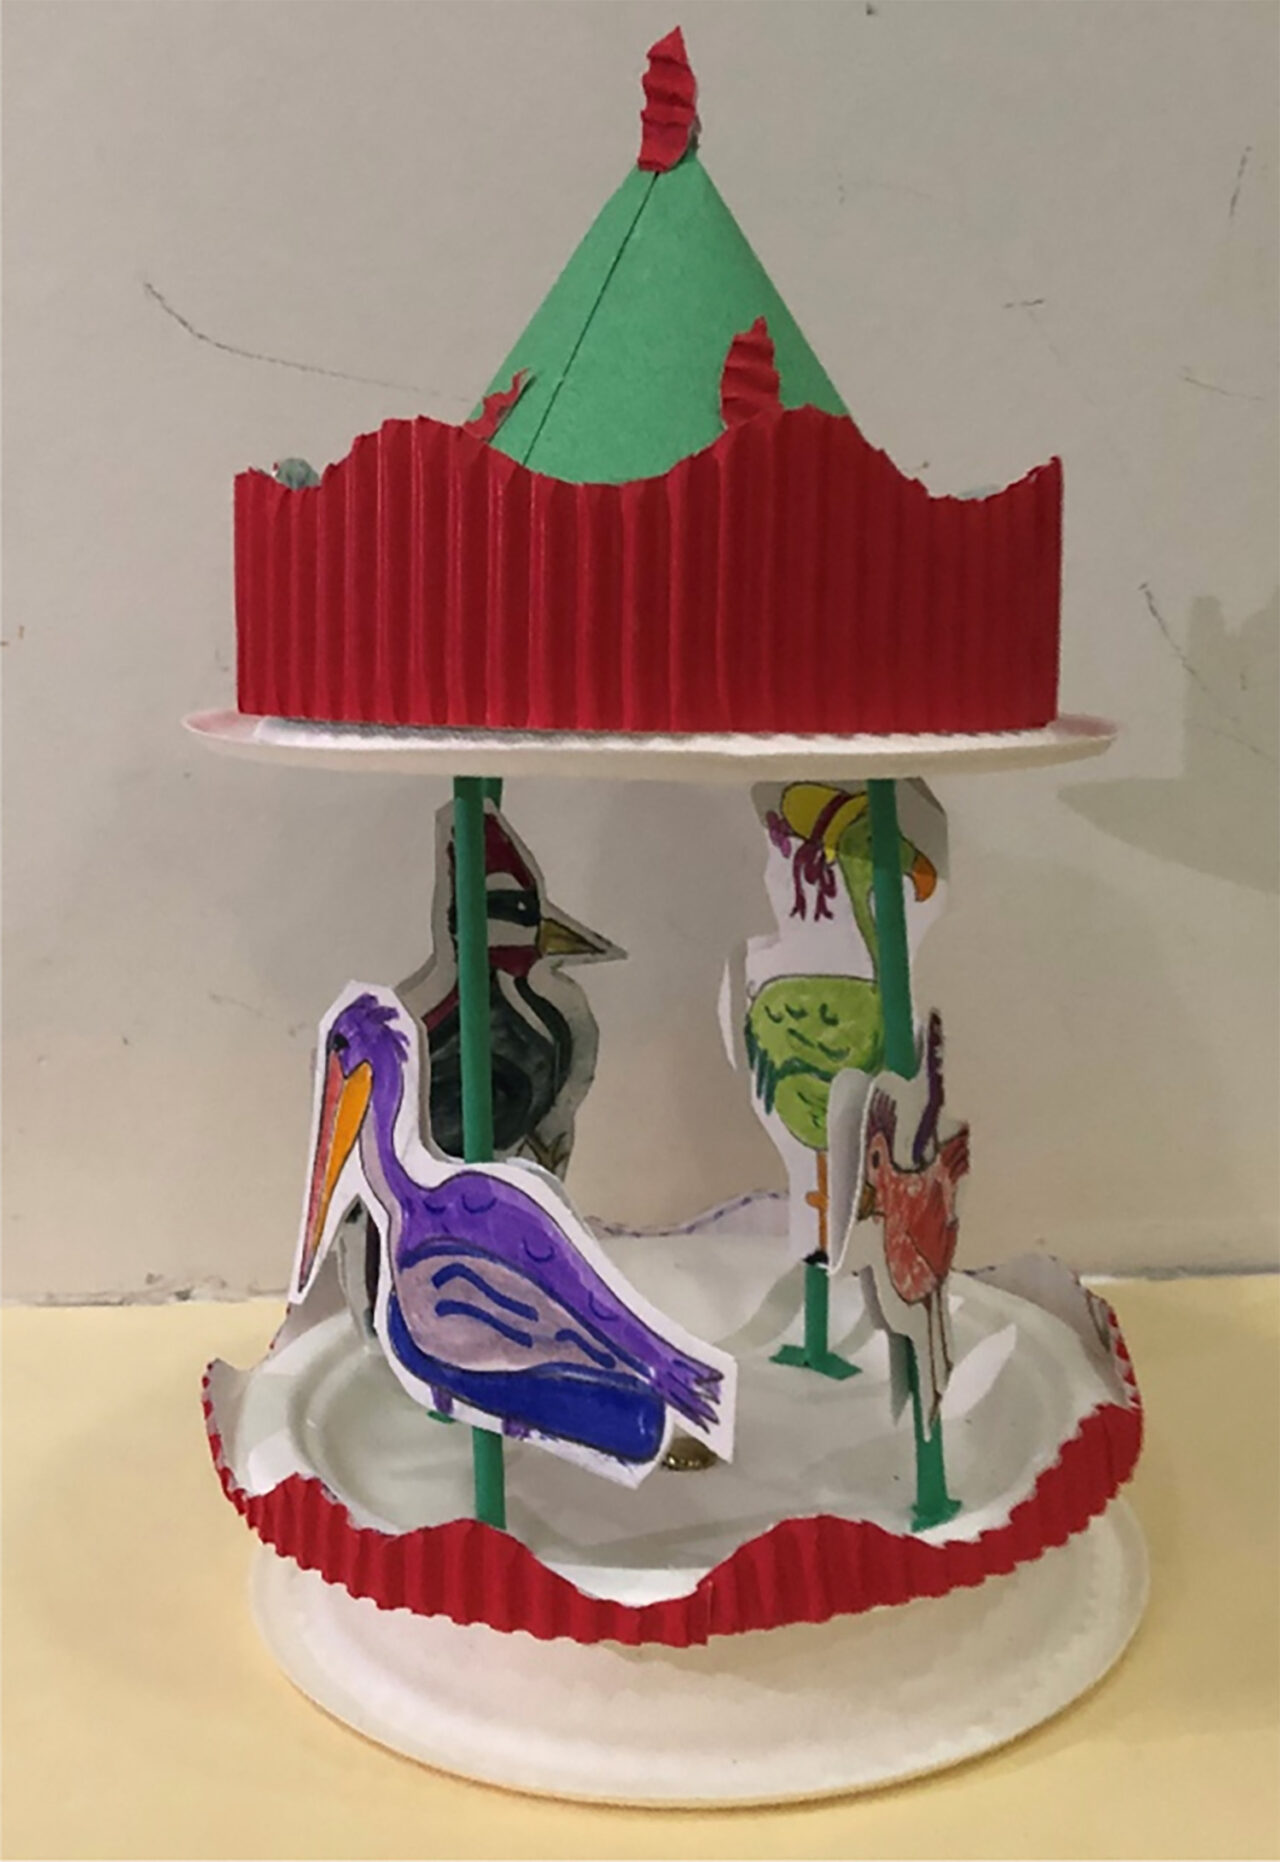
Follow these simple steps to design and build your own Merry–Go-Round. Choose a theme for your ride, such as our flying birds example, and design your own figures and decorations to match.
Download the PDF >
Materials: Scissors ▪ Pencil ▪ Colored pencils or crayons ▪ Glue ▪ Stapler ▪ 1” Paper fastener ▪ 3 Paper plates ▪ Cardstock ▪ 4 Paper straws ~ 6” long ▪ Miscellaneous colored papers
Step 1: Stack two paper plates together. Draw an X across the top plate to divide it into four even sections. Poke a hole through the center of both plates (where the lines cross) with your scissors. Set the bottom plate aside.
Step 2: Make a mark ½” in from the ends of the straws. Cut two slits in this section to create feet at the bottom and tops of the straws. Glue the straws on top of the lines on your plate to create your merry–go-round poles.
Step 3: Create your merry-go-round figures. These could be traditional horses or some other favorite creature or object to create a special theme for your ride.
Cut cardstock into four small rectangles and fold each in half. These should be the right size to wrap around your poles and fit between the top and bottom of the straw poles.
Draw figures onto one side of each piece and color them in. Then cut out around the figure leaving a little of the fold in place on one side. Open the booklet and redraw the figure on the back side of the folded piece, showing it in reverse. It does not have to be perfect! As long as they look similar, it will be ok. You will only see this back side a little bit as the merry go-round spins.
Color the back side to match the front. Once the figures are finished, staple or glue them into place around the poles.
Step 4: Place the third plate (without a hole) upside down on top of the straws and glue it onto the top feet of the straws to create the top of your merry-go-round. It is helpful to flip the structure upside down, so you can press on the straw feet to make them stick.
Step 5: Set this structure on top of the inverted plate with the center hole. Attach them to each other with the paper fastener, making this loose enough that the upper merry go-round structure can spin on the bottom plate.
Step 6: Add decorations to complete your merry-go-round and take it for a spin!